Part II: Calibrating your windvane for top performance (published November 2014)
You are sailing just fine somewhere over the briny blue when you notice something is not right in your heading and in the setting of the airfoil, or “airvane,” of your windvane self-steerer. The airvane is set for a close reach and is arcing fairly parallel to the vane mast, but the boat is on a beam reach—45 degrees off!
Having eliminated gremlins as the probable culprits, you double-check by turning the vane turret through a 90-degree tack, and now the sails luff wildly. Strange variations between your point of sail and the setting of the airvane no doubt point to one of two things: either the counterweight or the push rod is out of adjustment, or less likely, the bevel gears are misaligned.
The time to correct such an aberration is, of course, when your vessel is in a marina or a calm anchorage. Out at sea you can wait for a calm to make rough adjustments, but to dial in the system properly, the vessel must be lying on flat water in an absolute calm.
So here is the good news: if you do fine-tune your vane gear properly before each major ocean crossing, you can expect your self-steering system to stay calibrated and steer faithfully for thousands of miles, from the lightest navigable zephyr to the meanest sustained full gale.
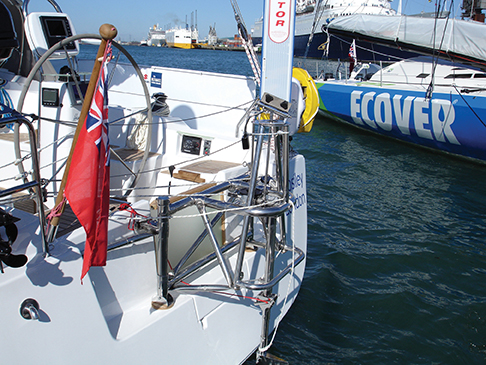
SERVOPENDULUMS
Servopendulum gears, the variety of mechanical self-steering commonly seen on cruising vessels, include the Monitor, Sailomat, Aries, Fleming and Cape Horn. Once assembled and installed properly, most servopendulums need essentially no calibration, unless part of the unit, commonly the counterweight, has come loose. The gears and linkages on some models are simply fixed into position and remain stable if left undisturbed.
Set up the vane gear as if you were going sailing, except for the control lines, which may remain attached to the vane gear but not the helm. An airvane, preferably the standard (not storm) foil, should be in its yoke, and the servo blade should be hanging vertically in the water. Disconnect the push rod from the vane yoke so that the airvane swings freely with no response from the servo rudder.
Using either a carpenter’s level or a string with a weight tied to one end, check the airvane to ensure that it is absolutely vertical. If the foil is visibly askew, adjust the counterweight up or down, inward or outward, depending on the design, until the airvane stands plumb. Now reattach the push rod to the vane yoke.
Next, see if the servo blade is in line with the keel; obviously, you cannot see the keel, so verify that the servo blade is perpendicular to the transom. Your only calibration tool here is your eyes; if it looks straight, then it probably is. If the blade is off from 90 degrees to the transom, you will need to adjust the pendulum bevel gear, or far more likely, the push rod (on the Monitor, the “actuator shaft”) to correct the error.
To adjust the push rod, loosen the lock nut where the threads meet the sleeve fitting, make the adjustment and tighten the nut. To realign the bevel gear, loosen the thrust bearing or other retainer fitting and pull the bearing away from the servo arm. Rotate the bevel gear one or two teeth until the servo blade is in line with the keel.
Finally, even if the airvane and servo blade line up perfectly, there is one more alignment you must check. Gently dip the airvane from side to side with your hand, checking to see that the trailing edge of the servo blade in the water arcs equally through either side of an imaginary line extending aft from the keel. In other words, the imaginary line should bifurcate the arc. If the arc is biased to one side, adjust the push rod extending from the yoke. Note that some models may require a small amount of bias to operate properly; check the product manual or contact the manufacturer to ascertain the required bias.
You will no doubt make several adjustments and observations—I’ll be honest, this is a pain—but once you have adjusted everything correctly and snugged up all the fasteners, the vane gear should be good for thousands of miles of sailing.
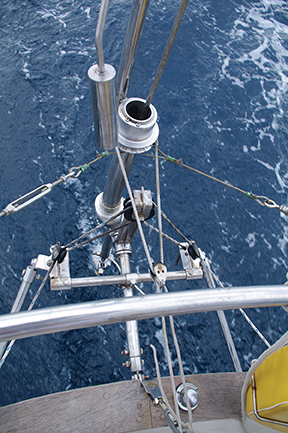
TRIM TABS
Calibrating a trim tab/auxiliary rudder unit, the best known of which is the Auto-Helm from Scanmar International, is far simpler than calibrating a servopendulum. The rudder itself, whether main or auxiliary, requires no adjustment because it is essentially a separate mechanism and rotates freely.
The airvane, linkage and trim tab comprise a separate system, which we superimpose on the main rudder or auxiliary rudder. If you have an old-fashioned model, such as an RVG with a vertical vane, your work is already done. You calibrate your system every time you change course. Other than that, simply make sure you tighten the appropriate fasteners and reduce as much unnecessary friction as possible in the solid linkage or some other peculiar fitting and test tthe operation of the fittings to ensure they hold tight.
A vintage RVG with a worn, slipping nylon clutch calls for the services of a machine shop to fabricate a replacement part. As with any type of vane gear model, check the base of the vane gear mast and all mounting hardware for dents, bends, cracks or rust, any of which could compromise the accuracy and smooth operation of the unit.
If you have an Auto-Helm or other modern horizontal-vane trim tab, calibration consists of aligning the airvane with the trim tab itself. First secure the auxiliary rudder so that it is in line with the keel. You can do this by tying a line to either side of the auxiliary rudder and lashing the lines to a couple of deck cleats.
Disconnect the airvane yoke from its cable or hard linkage, and check to see if it stands straight up. If not, adjust the counterweight to correct the error. Caution: if you adjust the Auto-Helm counterweight—or a servopendulum’s counterweight—out too far, you will dampen the foil’s wind-sensing ability, making it difficult to steer accurately in light winds.
With the airvane yoke reconnected to its linkage, observe as well as you can from your vantage point whether the trim tab extends straight back from the rudder. To make this process easier, have someone look from a dinghy or dockside to help you with adjustment. In a manner similar to servopendulums, the trim tab should be pointing straight back while the airvane stands perfectly upright.
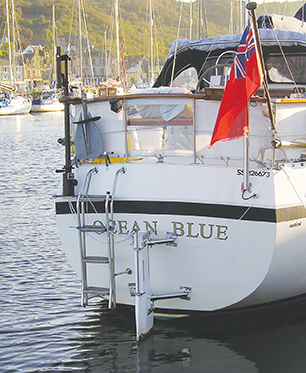
AIRVANE-CONTROLLED
The Hydrovane, in a class all by itself, is an airvane-controlled auxiliary rudder, which is to say this machine uses only the power of the air, not combined with mechanical advantage from the oncoming water current, to keep a sailing vessel on course. Air pressure on the Hydrovane’s long airfoil is transmitted through reduction gearing to an auxiliary rudder that steers the boat independently of the main steering.
The amount of force on the internal hardware of the Hydrovane steering unit is mind-boggling, especially if we consider the mechanical forces imposed by a sustained full gale. Incredibly, though, there is no calibration necessary other than the normal adjustment of the ratio knob through “0” (rudder trails freely), “1:1” (minimum steering power), 2:1 (average power) and 3:1 (top power), corresponding to vessel size and prevailing weather conditions.
Depending on wind speed, you will also want to make adjustments to the vertical axis of the airvane. For more sensitive steering, raise the airvane to a more vertical position. To dampen the sensitivity, gradually lower the angle until the vane gear and vessel are responding appropriately to steering impulses.
The only other services the operator can render to the Hydrovane is periodic cleaning with soap and water, lubrication and changing out of parts when they are worn. Keeping the internal parts in proper running order will keep the Hydrovane operating smoothly and accurately.
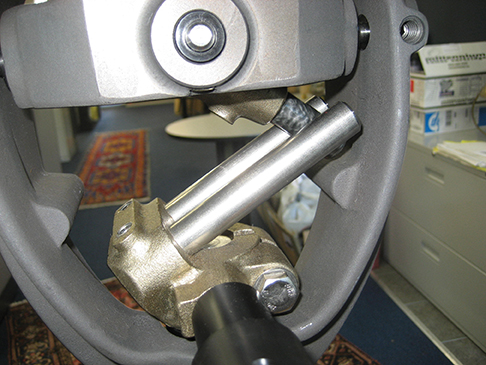
Keeping your vane gear ready for deployment and faithfully on course requires you to become intimately acquainted with every mounting tube, bevel gear and set screw on the unit. Over time, you will develop an intuitive sense of your vane gear’s moods. While sound asleep in your berth, at the precise moment the sails start luffing, you will awake, snap the tether to your harness, run out to the rear deck and know exactly what to look for, whether it be a snapped airvane, a broken steering line on the servopendulum, a plastic bag wrapped around the trim tab, or an overly sensitive ratio knob setting on the Hydrovane.
If you have not yet cruised on the open ocean with your self-steering gear, now is the time to put yourself and your vessel through the hoops and acquire the skills that will last for a lifetime of cruising.
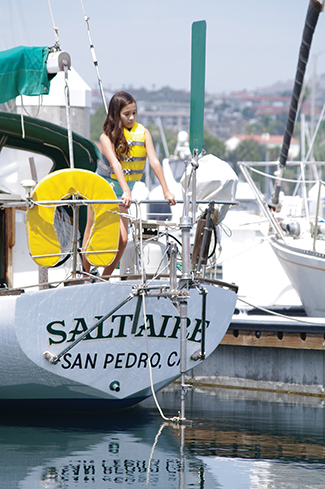
Bill Morris completed a circumnavigation, two-thirds singlehanded, via the Suez and Panama canals aboard his 1966 Cal 30 Saltaire. His philosophy is to harness wind, sun, and muscle as much as possible to provide power for onboard systems. Bill is the author of The Windvane Self-Steering Handbook, published by International Marine.
