From Rust Rises Endurance (published May 012)
After Brick House’s port upper shroud chainplate snapped in a remote area of the Pacific due to internal corrosion, Patrick and Rebecca Childress began the onerous task of replacing the mast. The couple holed up in Majuro, Marshall Islands and played the waiting game for six weeks as the new mast was shipped from California. Read about the first leg of their journey in the April BWS.
Next to our boat, stretched out on five wooden sawhorses, the assembling of the mast began. Most French cruisers already know of the benefits of butyl sealant. American cruisers, it seems, are just catching on. In the U.S., white butyl, in a caulking gun tube, is used for joining sections of aluminum house gutters. From summer heat to winter freezing, it is the only product that has the elasticity and tenacity to survive. Butyl, in a coil and colored black, is the sealant that keeps tens of millions of car windshields from leaking. It has a proven record.
But working with butyl is like working with flypaper. It sticks to everything and then pulls into a long string and even then will not let go. A rag of mineral spirits must be kept close at hand. Since liquid thread lock is not thick enough to fill the gaps of the flathead screws joining the mast sections, butyl was the perfect sealant to guard against water intrusion, screw rotation and galvanic corrosion. Butyl is also the perfect sealant for chainplates and for keeping water out of Norseman swageless terminals. Silicone and 5200 have failed me in those applications.
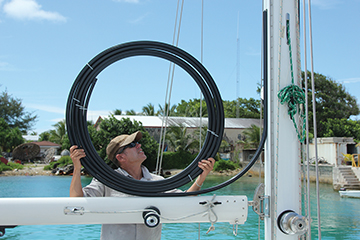
In assembling the mast, I have only one regret. I had saved electrical wire from our old mast so I could install our new steaming light. That project required squeezing an additional wire 40 feet through the existing bundle with an electrician’s snake, sawing into the PVC chase without damaging other wires, and pulling the new wire out and through a new hole drilled in the mast. It would have saved me hours and would have been far safer and worth the expense to have had the mast maker install that wire in his natural order of construction rather than my retrofitting.
Before lifting the mast onto the boat, all halyards were installed and clevis pins were set to attach the wire stays to their proper mast fittings.
THE BIG DAY:
SETTING IT IN PLACE
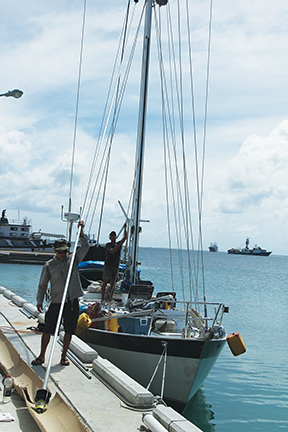
With the mast resting on its back, the lifting strap for the mobile crane was wrapped twice around the mast just below the running pole topping lift, which is about one-third the mast length from the top. When the mast was lowered through the coach roof then rested on the keel, four temporary ropes—already secured above the spreaders—were tied to cleats on deck. The crane was then able to detach and move away. The three halyards coming out of the top of the mast and one temporary line were also secured as stays and shrouds to center the mast as well as possible. The work of cutting and installing the wire rigging could begin.
A thin line tied to the spinnaker bale at the top of the mast supported a five-pound dive weight at deck level. This plumb-bob determined fore and aft positioning. The main halyard pulled to the port deck, then a corresponding spot on the starboard deck determined athwartship positioning.
Once the wire stays were secured with their swageless terminals and the rig tuned as well as possible, the next project was to install the new genoa and staysail roller furlers. The spinnaker halyard was secured at the bow as a temporary headstay so we could take down the wire headstay and lay it on the ground for the assembly of the Profurl.
ROLLER FURLERS
Our two 20-year-old roller furlers took a beating in the dismasting. This was the time not to rebuild, but to replace the furlers. Rebecca endlessly researched roller furlers for durability and pricing. What we started with had served us well and the research reaffirmed that Profurl would again be mounted on Brick House. We’d be installing the NCI32 on the inner forestay and the larger proportioned NCI42 on the headstay.
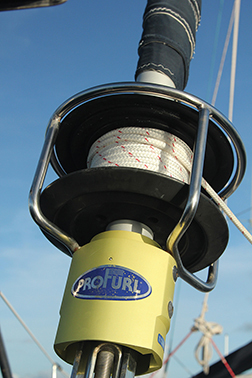 Profurl simply makes a hardier unit using quality anodized aluminum parts and the most durable plastics where best suited. Profurl has recognized that sailors—especially long distance cruisers—cannot maintain their equipment like a boat owner who ties to a dock with a fresh water hose nearby. Furlers must be made to withstand a salty environment and live in one of the highest stressed parts of the boat—and do so for decades. One unique maintenance-free item on the Profurl is the carbon steel bearings, which are completely double-sealed in a grease bath to increase their working load and prevent corrosion. Additionally, with a global network of distributors, it is not a problem replacing a Profurl part like the link plate I dropped over the side in New Zealand. With our interest in titanium, it is comforting to see Profurl use the very noble titanium screws to hold the aluminum housing, link plates and line bales together.
There was one snag with the assembly. The stapled set of photocopied Profurl instructions was difficult to read. The instructions were further cumbersome because they contained instructions for all the Profurls manufactured. I went page by page and marked the instructions that pertained only to my installation, then removed the instructions that were not relevant. This greatly streamlined the instructions and visual flow of what needed to be done.
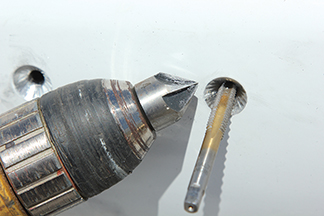
With the headstay and turnbuckle lying on cardboard, the Profurl drum was slipped over the turnbuckle. From the top of the wire, the bottom-most extrusion was passed over the eye terminal. The Profurl extrusion is designed to pass an eye swage but nothing larger. With all the extrusions in place and the upper-most extrusion cut to the proper length, we inserted all the set screws joining the extrusions, but at this time did not use the supplied Loctite. While the furler was still on the ground I cut the stainless steel link plates to the length needed to raise the drum away from obstructions on the deck. The link plates can also be used to raise the foot of the sail to help it clear lifelines. Before cutting the link plates to length, I drilled the required holes. When sawing stainless steel, it is best to cut it by hand with a hacksaw so not to heat the metal. Overheating stainless steel with a power cutoff wheel will move the chrome away from the cut area and cause the stainless to rust.
Using the jib halyard, we carefully hoisted the furler assembly and stay to the top of the mast, inserted the clevis pin, then finished off the connection at the stem plate. Only after the furler was fully installed and we were sure no mistakes had been made did I go up the forestay in a bosun’s chair to set the extrusion screws with Loctite. It is not an option to not use a thread locker. The odds are too great that these screws will back out, possibly damaging the sail but certainly making it so the sail cannot be lowered.
There are two items not covered in the Profurl manual. First is the need to coat the titanium screws with LanoCote to help isolate the metal from the aluminum housing. The other is that if the short link plates are used to get the furler drum as close to deck level as possible, a swaged, threaded-stud terminal will have to be used on the stay; any other wire fitting, like a swageless terminal, will be too large in diameter and could possibly interfere with the extrusion when tightening the turnbuckle. The swageless terminals can be used at the top end of the stay.
MAINSAIL TRACK
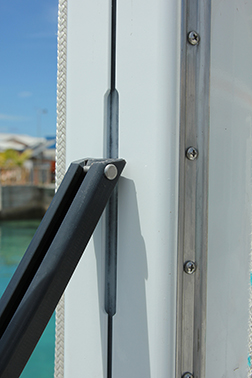
It would have been easy to change the slides on our mainsail to be compatible with the internal track of our new mast. But on our 40-foot boat, the friction of nylon slides inside aluminum is too high for easily raising and lowering such a large sail. There are mainsail systems that slide on roller-bearing cars. Although those systems are easy to raise, there is so little friction that everything comes crashing down unless one constantly has a hand on the halyard with a wrap around a winch. I much prefer the Tides Marine Track and Sail System (formerly called the Strong Track—www.tidesmarine.com). This is the system we had on our old mast. The track is made of a hard, slippery, ultra-high molecular weight polyethylene and manufactured in continuous lengths up to 65 feet. The polyethylene is not affected by salt water and is stable against ultraviolet sunrays. With the supplied stainless steel sail slides, or cars to carry full-length battens, the sail is easy to raise. Releasing the main halyard, the sail smoothly drops but does not crash down. On our boat, the last several feet of sail triangle stays suspended just above the boom until it is ready to be flaked and then is easily pulled down.
The Tides Marine Track and Sail System is flexible and simple to install. It is inserted into the mast groove and slid up the mast. This can be done if the mast is standing on a boat or horizontal on land. The track is available in more than 125 different shapes to fit a variety of internal luff grooves as well as several external track shapes.
Once the track is in position on the mast, the base of the track can be secured to the mast using one of two Tides backing plate assemblies. In most cases, no holes need to be drilled in the mast. It is that simple. The stainless sail slides are held to the sail tabs with simple pins and a retaining ring. Very easy to install and there is nothing to maintain.
NEW JIB SAILS
Most new Dacron sails do not last as long as they once did. To some extent, this is because of the variety of lower quality material used by sail lofts to be cost-competitive. Our boat puts on thousands of miles every year and at times is heavily stressed. “Cheap” sails on our boat actually equate to being very expensive due to a short life expectancy. For our two new headsails, we did not want to pay for cheap, rebranded, Taiwanese sails. We wanted the best cruising cloth possible put together with American hands and sailing know-how. Mack Sails in Stuart, Florida had what we wanted. Mack uses only the best, most expensive Dacron, Challenge Sailcloth’s Marblehead cloth made by Bob Bainbridge. These fabrics are the finest, most tightly woven fabrics in the world and rely on the quality of yarn and weave, rather than impregnated resins, to maintain integrity.
To distribute loading more evenly across the fabric on our genoa, and to hold the sail shape for 15 to 20 years, the sail was sewn with the more difficult miter panels rather than the easier to sew, long, crosscut panels. All the miter panels are joined using triple zigzag stitches. There are many details that go into a strong Mack sail, like the finished seams along the leech and foot of a sail called tabling. On our Mack Sail, the tablings are two-plied with an extra thickness of wider Dacron tape under the tabling. Leech lines are always centered in the tabling with stitching on either side to prevent the very aft edge of the sail from “cracking.” These sails will certainly be with us around the world and beyond.
Every company that had a hand in our remasting understood our intentions starting with the titanium chainplates. There would be no weak links. Thank you Allied Titanium, Ballenger Spar Systems, Profurl, Tides Marine and Mack Sails. Our Brick House is back together and ready for any ocean and many years of challenges.
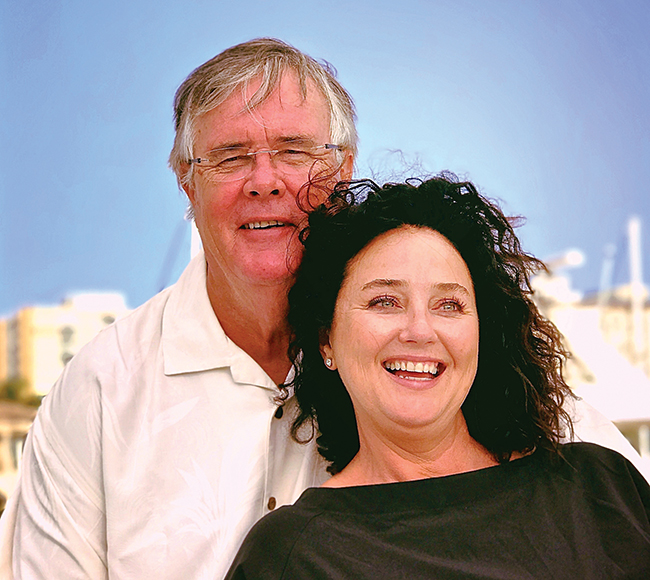
World cruisers Rebecca and Patrick Childress are now happily exploring remote Pacific islands and beyond.

