Taking proper care of your life raft is critical to making sure it will work when you need it most (published May 2014)
When I stepped into my life raft at Westpac Marine Services in Tacoma, Wash. and sat down, I tried to imagine what it would be like to sit in this same spot in the middle of a raging ocean with my family. I must admit, it was a difficult and sobering thing to picture while in the middle of a life raft servicing shop. But I knew that spending the time to go through my raft with an experienced technician could be a huge benefit in the unfortunate event of an emergency at sea.
In the three hours I spent inspecting my Avon 6-person Ocean life raft with Rollie Herman of Westpac, I definitely learned a lot about my raft and why it is important to keep it properly maintained, but also got some helpful tips on safety at sea as well. If you don’t know what your life raft looks like while it is inflated and about its components, I would highly recommend finding a service center that will give you an in depth tour of your gear.
FINDING A FACILITY
When it comes time to get your life raft repacked, you want to find the best facility you can to take care of this important piece of equipment for you. Start by checking with the U.S. Marine Safety Association (www.usmsa.org) to find an authorized service facility for the brand of raft that you own. Manufacturers issue repacking facilities with a certification or letter of approval and the company you choose should be willing to produce that—any hesitation and it is best to look elsewhere.
Every life raft is unique in how it is packed, what materials it is made out of and what parts it may require for proper servicing. While many service centers carry everything they need to repack and recertify your raft, they may have to special-order parts or make repairs that can delay the process, and they won’t really know until they actually unpack and inspect your raft. This causes a level of uncertainty about how quickly your raft can actually get repacked, so it is best to give the process a few weeks instead of making it a rush job before heading offshore.
LEARNING ABOUT MY RAFT
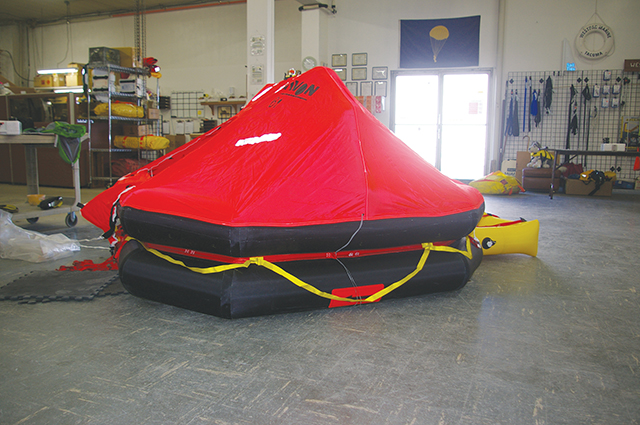
Before going into Westpac for my raft’s three year servicing, I didn’t really know what to expect, but Rollie graciously took the time to explain every part, feature, seam, and nook and cranny of our raft.
In an introduction to how a life raft is designed, manufactured and then serviced, Rollie described how every step of the process is in place to ensure that a life raft is able to do two things without fail: inflate and hold air. If a raft doesn’t do those two things, you’re in trouble, which is why it is imperative to get your raft serviced at the intervals suggested by the manufacturer. The longer you let your raft go between servicing, the more likely it is to need more expensive servicing, be condemned, or worse yet, fail when you go to set it off in an emergency.
We started with a visual inspection of my raft’s valise. He explained how the stitching on Avon and Zodiac valise’s varies to allow the raft to burst out after the painter has been pulled to set off the air canister and deploy the raft. There are stronger and more brittle threads strategically placed so the raft will come out of the valise properly in the water. Other manufacturers use hook & loop (Velcro) or light cord to achieve the same result.
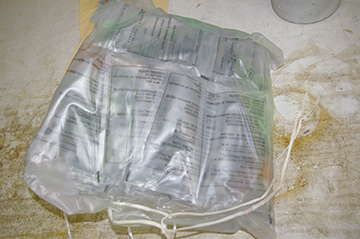
Rollie also went over how to store my particular raft and we talked about places to keep it on my boat that would make it readily accessible in an emergency, yet keep it away from too much sunlight or humidity. Finding a place to store your life raft so it stays dry is imperative, and can be one of the biggest mistakes an owner can make. It is important to note, too, that changing from a valise to a hard canister can be very expensive, if not impossible, so when choosing a raft, thoroughly consider all your storing options before the big purchase.
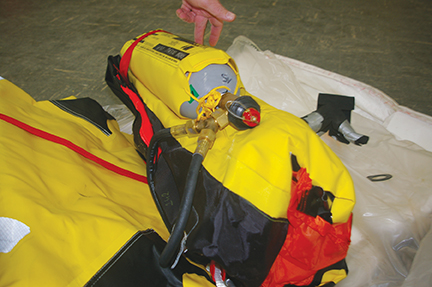
After opening the valise, we found my raft vacuum-packed in a bag designed to keep moisture from getting into and degrading the raft. Rollie cut open the bag and went to work inspecting and explaining my raft’s inflation system, which consists of a canister of air and two valves that feed the lower tube, and upper tube and arch. There are two types of canisters you are likely to find to inflate a raft, CO2 and air, with CO2 being the most common. The key difference is that CO2 may be a bit more sluggish to fill the raft in colder temperatures.
It is rare that a repacking facility will actually set your raft off with a canister of CO2, as the cold will degrade the inside of the tubes, but this depends on the manufacturer of the raft. Rollie removed the air canister on my raft and filled up each tube with an air compressor. The air compressor filled the raft at a slower rate then a canister would, but it was neat to see how each part expanded. As it filled, he talked to me about how to keep the raft properly inflated, walked me through all the raft’s valves and showed me how to inspect and repair them with the parts provided inside the raft.
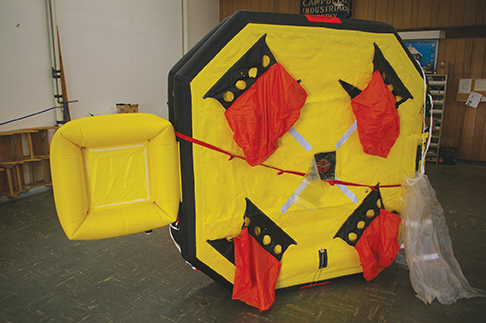
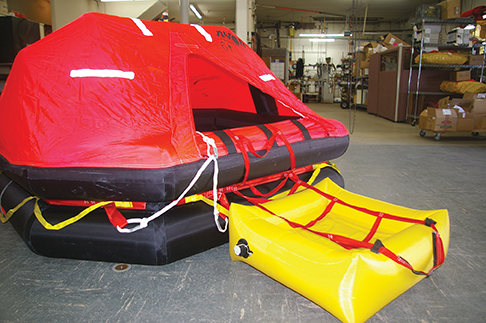
Once the raft was fully inflated and the valves were inspected, I got a tutorial on how to enter the raft from a boat or from the water and how to right it in the event that it capsized or inflated upside down. Our raft has an inflatable boarding platform on one side that is helpful when entering from the water. The other side has a webbed ladder, which would be where you would want to enter the raft from the boat. The right time to get in a raft is a pure judgment call given the circumstance, but leaving a floating boat to get into a life raft is generally frowned upon. Also, inflating the raft too early could cause it to be damaged by the boat or lost at sea if the painter chafes through. Knowing how to right your raft is important, as they don’t always inflate right side up and the maneuver is best done from a specific spot on each raft. Our raft had a patch denoting the spot to right it from and a small picture of how it should be done.
Rollie tipped the raft over during the righting demonstration and while it was capsized on the shop floor, we looked at the important features on the bottom. Ballast bags are a big part of how a life raft works and my raft had four big ones. Apparently, ballast bags have come a long way in the past 30 years or so and are now larger to accommodate more water, are typically weighted at the bottom and are made of a dissimilar material to the bottom of the raft to avoid sticking. Our raft also had a self-bailer in the middle of the floor that would be able to let water out but not back in.
When I finally climbed inside, it was an unnerving feeling to sit and look out from underneath the orange canopy. The doors on a raft either zip from top to bottom or bottom to top. The two doors on our raft zip from the tube up, which would allow for some ventilation or for a view out. We went through all the supplies inside the raft and I was surprised to know that it—and most rafts—actually comes with very little in the way of survival gear. There was enough water for six people for 24 hours, paddles, valve covers, sea anchor, knife, pump, tapered plastic cones to plug a leaky tube, two flashlights and five flares.
This led to a lengthy discussion on ditch bags, EPIRBS, PLBs and why modern rafts carry so little. The bottom line is that with modern search and rescue technology, rescue typically takes no more than a few days and the added weight of extra gear would make the raft harder to handle in the event of an emergency. It was also noted that the ability to add extra items to your raft depends on the manufacturer and that adding or removing items not specific to the raft’s specifications may void its certification.
SWITLIK MOM8 SERVICING
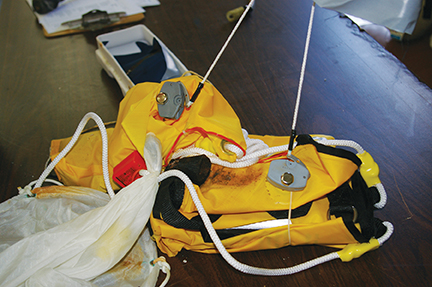
Our MOM8-A was also due for it’s two-year servicing, so I brought that in for Rollie to take a look at as well. Made by Switlik, a MOM unit is a clever crew overboard device that drops from a canister mounted on a boat’s pushpit. As the device falls from the canister, pins are pulled from inflators that set off two CO2 cartridges. A tall, lighted pylon and horseshoe inflates as they hit the water, while a sea anchor deploys to slow the unit’s drift rate. If deployed quickly after a person has gone overboard, the MOM8 can be an extremely effective marker and buoyancy aid.
Similar to a life raft, a MOM unit has to be serviced by a certified facility. For a list of service providers visit www.switlik.com. Also similar to a life raft, it is imperative to keep up with the service schedule of your MOM unit as water encroachment and the unit’s relatively exposed mounting position can degrade this valuable piece of safety gear.
When we opened up the MOM8-A’s hard case it was quickly apparent that both CO2 canisters were corroded well past their prime. Rollie then used an air compressor to fill the pylon and horseshoe to check for leaks and any chaffing. As with the life raft, he gave me a part-by-part explanation and showed me how the horseshoe should be worn and used to lift a person out of the water.
 I’m not sure how many times a life raft technician hears the words, “I hope to never use this.” But when and if it comes time to use one of your most important pieces of safety gear offshore, and it inflates and holds air for you, you’ll be glad you took it in to get serviced. And although the view may be unsettling from inside your raft at a servicing facility, the familiarity and peace of mind gained by taking the time to go through it with a professional is well worth the effort.


