Regina Oceani‘s refit continues… (published April 2012)
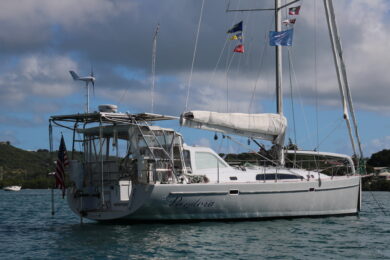
Having gained some painting experience by refinishing the spars on our Pearson 424, Regina Oceani (January 2012), our story continues with the refinishing of the decks. If painting the masts is the equivalent of sailing the Atlantic, painting the decks is like sailing the Pacific, with a cape or two thrown in for good measure. But just as in sailing, as the challenges increase, so do the rewards. Here, we will cover all of the elements that made painting the decks different from painting the spars. For details on spray gun selection and the specific steps of painting and sanding, refer to the spars article.
REMOVE EVERYTHING
YOU CAN
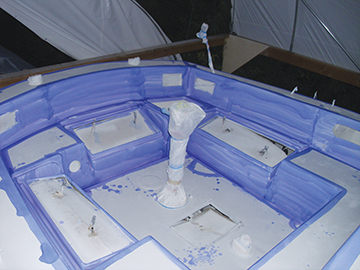
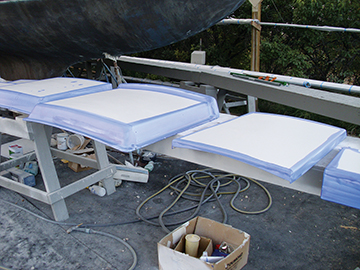 Before removing the first screw, I carefully photographed the entire deck to log the location of all hardware. This proved to be very valuable later. I removed every single piece of hardware from the decks except for the chainplates and four pad eyes, for which I could not access the securing nuts. All lazaret covers, companionway hatches and covers, and hatches were removed to be prepped and painted separately. I left the ports in place since we plan to replace them later—the replacement units are slightly larger, so no paint line will show. Some may attempt to mask around deck hardware, but any time saved avoiding its removal will quickly be eaten up by sanding around it.
After removing the teak atop the cockpit coaming, a vast network of cracks was discovered. These and other cracks, dings and crazing—particularly where vertical surfaces meet the deck—were ground out with a 40-grit flap wheel mounted on an angle grinder. Just when I thought the boat looked about as awful as it possibly could, I discovered some rotted core around the forward companionway. The hole in the deck got larger and larger as I removed rotten core until I came to solid dry core. At this point, a less optimistic person might have thought the boat would never recover. Visiting friends just shook their heads.
The cut out area was filled with structural foam and overlaid with fiberglass roving. Alexseal 202 fairing compound provided the base for fairing (read: lots of block sanding) the deck back to a perfectly continuous surface with no evidence that the repair had ever happened. For all the other ground out areas, the deepest grooves and all holes in the deck were first filled with Cabosil-thickened epoxy. Fairing compound here again brought the surfaces up to the point where they could be block sanded level.
SMURF ATTACK
All surfaces that will not have texture must be perfectly smooth and fair to accept the glossy top coat. To reveal the smallest of defects, a sanding guide coat must be applied. I decided that guide dust, as I used on the spars, would create a huge mess on the decks, so instead I used a machinist’s layout dye diluted 1:4 with denatured alcohol as my guide coat. The dye was brushed on with a foam brush and the next few days of sanding began. Any final pinholes were filled with a high-quality two-part glazing compound, re-primed and re-sanded.
WHERE TO STAND?
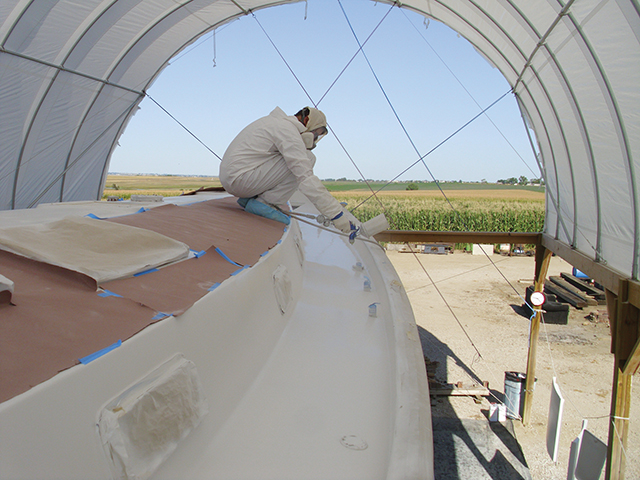
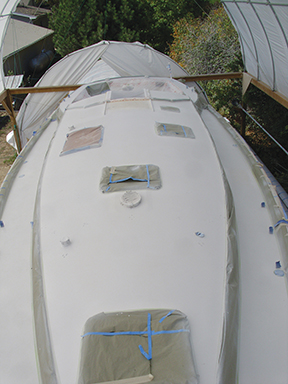
After masking the toe rails, ports and all large openings such as the companionways, hatches and lazarets, three coats of Alexseal Super Build 302 primer were applied. To do this, I divided the deck into two areas—one to paint and one to stand on while painting. First the cabintop, cockpit coaming top, and vertical sections and seats of the cockpit were sprayed while I stood on the outer deck and cockpit floor. A day later, builders’ paper was spread over the painted areas. I stood on the paper while spraying the remainder of the decks and cockpit.
VERTICAL MEANS GLOSSY
All vertical surfaces and the transition areas between the vertical and horizontal surfaces were sprayed with three coats of gloss Alexseal 501 Top Coat. We used “Cloud White” for these surfaces. There was no need to create a rigid transition between the gloss and to-be textured areas. I just allowed several inches of bleed of the glossy top coat into these areas. The lazaret covers and hatch frames, which were hung from clotheslines around the boat, were painted at the same time.
TEXTURE OFF, TEXTURE ON
Prior to fairing the deck, all molded-in texture was sanded out. This job took several afternoons and around fifty 80-grit sanding disks on an electric orbital sander. The top coat was masked with over 700 feet of 3M 233 green masking tape to create the perimeters of the flat areas of the deck that were to be textured. A quarter (coin) was used as a template for all corners, which were cut out of the masking tape with an X-Acto knife. A penny was similarly used for the curves around hinges, etc. on the lazaret covers.
Masking paper and plastic film was then taped over all the glossy areas, leaving only the to-be-textured areas exposed. The texture powder comes in both course and fine grits. I made a mixture of 2/3 course, 1/3 fine and added this to the slightly grayer “Matterhorn White” Alexseal 501 Top Coat mixed with slightly different thinner ratios (per the data sheets), and sprayed this with a 1.7mm nozzle. I considered adding flattening agent to cut the gloss. Instead, Alex Sandas of Alexseal (again, not “the” Alex) suggested that the texture itself would reduce the gloss and that using the top coat without flattening agent would keep the paint easier to clean later. Alex also made an invaluable recommendation: carry a rag to frequently wipe off the tip of the spray gun to avoid drips while spraying texture. Two coats of texture were adequate.
THE WOW FACTOR
Pulling off the masking tape and paper the next day is about the most fun you can have with your clothes on—the revealing of the sharp transition between the texture and gloss uncovers the closest thing you will ever see to a factory-fresh new boat look. I found that the texture shed until I rubbed it lightly with a Scotch-Brite pad to free the last of the loose grains. This gave the texture a very even finish with plenty of grip to keep sailors glued to the deck.
Those visiting friends who shook their heads when the boat was at its roughest now simply said, “Wow.” The seemingly endless hours of sanding were worth it—the reward is a like-new looking boat. Compared to the decks, the upcoming hull and bottom paint (the last phases to complete the repainting) should be a cake walk—more comparable to an island hop than an ocean crossing.

DRESS FOR SUCCESS
From head to toe, prepare yourself to sand. A sweat band keeps the drips off the deck. Ear plugs cut the noise of power sanders and keep the dust out of your ears. A quality P100 respirator should be worn at all times while sanding. Padded gloves ease the fatigue of holding sanding blocks or orbital sanders for hours. Disposable Tyvek pants keep you and your boat clean. Cloth knee pads provide the soft surface you need for hours bent over the deck. Finally, disposable paper shoe covers keep the deck clean and should also be used while painting to keep your shoes clean.
BWS is following Pete and Jill Dubler’s refit and restoration of their Pearson 424, Regina Oceani, in a cornfield in their home state of Colorado. After more than 5,000 offshore miles crewing for others, Pete selected the 424 for future cruising. It will take a few years, but Pete is committed to the belief that cruising should not be “repairing boats in exotic locations,” so she will be “sound and Bristol when she splashes.”

