Previously published in BWS by Heather B. Hamilton.
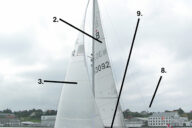
Any experienced cruising sailor knows the importance of being able to reef your sails in heavy weather to reduce power and heeling. As a safety feature, at least one, and preferably two reefs are critical.
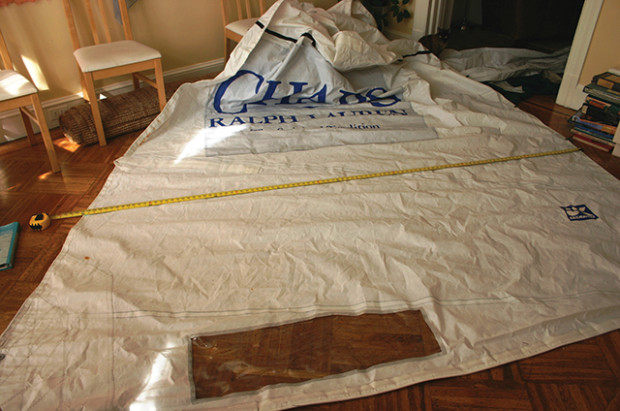
 So when my husband and I replaced our mainsail a few years ago with a used racing sail, I’m not sure if we were more appalled to find the sail emblazoned with “Ralph Lauren Chaps: The Spirited Tradition” in massive blue lettering, or to discover that it had no reef points. As we were leaving on an October Chesapeake cruise shortly, I decided to tackle the job myself.
INGREDIENTS
• 1 sail
• Spur die kit 5/8” (this is the tool
that allows you to set grommets)
• 5/8” grommets (one per reef point)
• Sail cloth for reinforcements (I
used self-adhesive; it’s easier to sew
something already stuck to the sail)
• Sail thread of the proper weight for
your sailcloth
• Measuring tape and yardstick
• Something to mark the sail with
(I’m a fan of the disappearing ink
pens used by quilters)
• Scissors
• Paper to make patterns
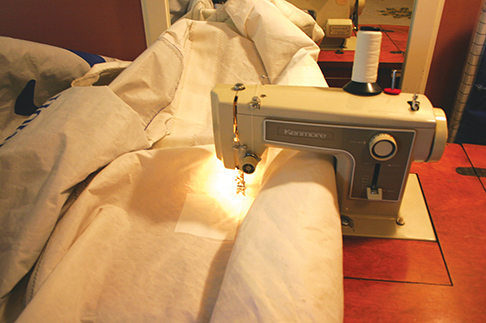
• Sewing machine (my grandmother’s
1950s Kenmore stood up to the test)
• Three to four feet of ¼” line for
each interior reef point; more for
larger sails and second reefs
I HOPE YOU’RE GOOD AT MATH…
Before starting, I needed to figure out where the reef points should be located. The first reef in a sail should reduce the sail volume by 25 to 30 percent. If you want to add a second reef, it should be placed above the first reef row at the same distance from the tack to the first reef tack.
 To determine placement, I laid out the sail and measured the length of the foot and the luff in inches (114” x 360”). From that, I calculated the volume of the full sail (pretending that a sail is a perfect triangle): (114 × 360) / 2 = 20,520
Next, I figured out what a quarter of that volume was: 20,520 / 4 = 5,130
Since we’re dealing with approximates here, I computed the height of a rectangle with the same width as the foot of the sail. While this won’t be exactly 25 percent, as the foot of the sail is not straight, it should fall within the specified range:
5,130 (volume of theoretical rectangle) = 114 (length of foot) x Y (height)
Y = 5,130 / 114
Y = 45” = 3’9”
MARK THE SAIL
First, you need to find a space large enough to lay out your sail, at least from the foot to the reef points. My dining room floor sufficed. Using disappearing ink, I marked off the spaces for the reef clew ring and the reef luff ring (the two outside rings, on the leech and luff of the sail), measuring 3’9” vertically from the foot of the sail for the luff and 4’3” for the leech. On boomed sails, you want to kick up the leech to prevent boom sagging; add three inches for smaller boats, at least six inches for boats from 25 to 45 feet, and 12 to 18 inches on larger boats.
Next, I drew a straight line two inches below those two points for the rest of the reef eyelets. You want the middle reef eyelets to be below the points on the luff and leech so that they don’t bear any of the load of the sail. All of the load of the sail should be on the two outer points, with the reef ties just holding the rest of the sail from flopping about. I used a straight line because I had a footed sail; straight lines are also appropriate for modern full-battened sails; on loose-footed sails, draw the line to match the curve of the foot.
Interior reef eyelets should be at least a foot and no further than two feet apart (even on large boats), and you want to space them evenly. I placed mine 18 inches apart.
MAKE PATCHES
You need to reinforce the reef point locations so that they are strong enough to withstand the strain. I created paper patterns for the inside and outside reef point reinforcements. The inside reef eyelets can, theoretically, be reinforced with patches in almost any shape, but I went with a traditional square shape as it is much easier to sew, particularly on a home machine. I measured the patches four inches on a side and placed them with the corners on the axis, like diamonds. The reef clew and tack point reinforcement patches should mimic the shape of the sail’s corner patches.
Keep the patch fabric direction the same as the sail fabric direction; I drew Xs in the warp and weft directions of both the sail and the reinforcement fabric and matched them up before cutting the patch.
For each of the reef points, cut two reinforcing patches—one for each side of the sail. Remember to flip the patterns for the clew and tack points so you get two sticky sides together if you are using adhesive fabric. Now, you can sew on the inside patches, but the outer patches—the clew and tack points—are trickier. You need to unpick the sail at the leech and luff reinforcements so you can place the patches under the reinforcing fabric and directly on the sail.
READY TO SEW
Each one of the patches should be sewn around the edges. This is actually quite a doozy of a project on a home machine, as you have to force yards of very heavy fabric through a small space in the machine. Sew the same side of each patch along the reef line with the widest zig-zag setting, rolling the sail as you go. When sewing the clew and tack patches, don’t forget to re-sew what you unpicked earlier.
INSTALL GROMMETS
Cut a hole in the middle of each patch through the sail and patches. While you can make an X, I chose to cut holes out with an X-ACTO knife. I bet this job is much easier with a sharp, hot knife, but I managed to make my pretty little holes with minimal swearing. You want the holes (or X) just large enough to force the barrel (male part) of the grommet through. As you install the grommets with the die kit, don’t forget to rotate each a quarter of a turn every other tap of the mallet (which, when dealing with a big sail, means turning yourself).
LAST STEPS…
Cut each reef line long enough to tie around the boom and reefed sail—mine were three feet each. Whip the ends of each piece; while you can “butane splice” with fire, the constant wear and tear on the lines makes it worth doing a good whipping job on them. Pull each through the center reef eyelets until even on each side, then put a simple knot on either side of the grommet to keep the line from falling out.
 Voila—you’re finished!
Heather B. Hamilton spent 15 years in Washington, DC trying to save the world before buying a sailboat and setting out to see the world. She and her husband Pip are currently exploring the Caribbean on Picaroon, their 40-foot Hardin Sea Wolf ketch.